# System
Sprout has a system menu that provides several resources.
# System Settings
System settings allow the end user to dynamically configure various system resources.
There are two options to access system configuration, but first of all you need your user to have access permissions.
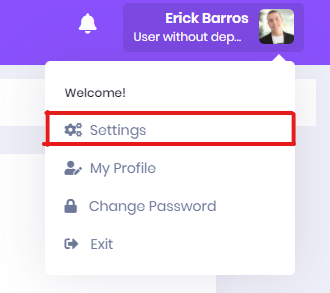
- The first form is available for administrators only and is located in the user panel:
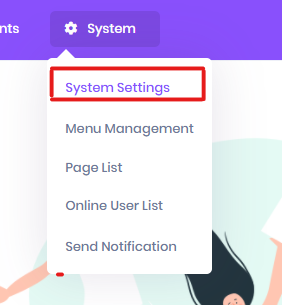
- Another way to access is through the item System Settings in the system menu, which is enabled by default:

# Information
On this tab you can define the system information that will be displayed on the login page and main menu.
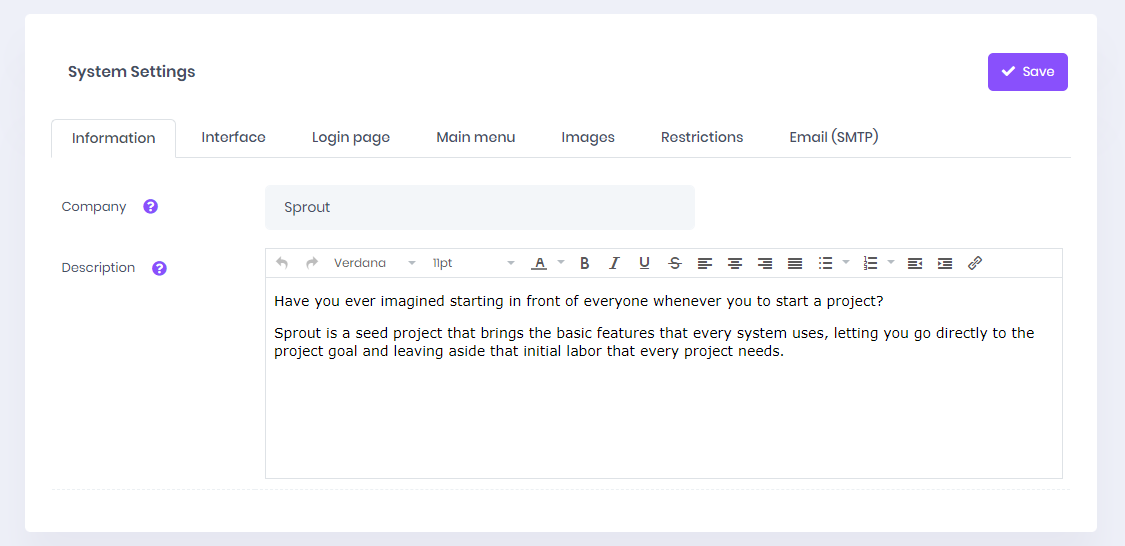
# Company
Defines the system name that will be displayed on the login and main menu pages when there is no image defined.
# Description
Allows you to add a custom description with colors, sizes and links.
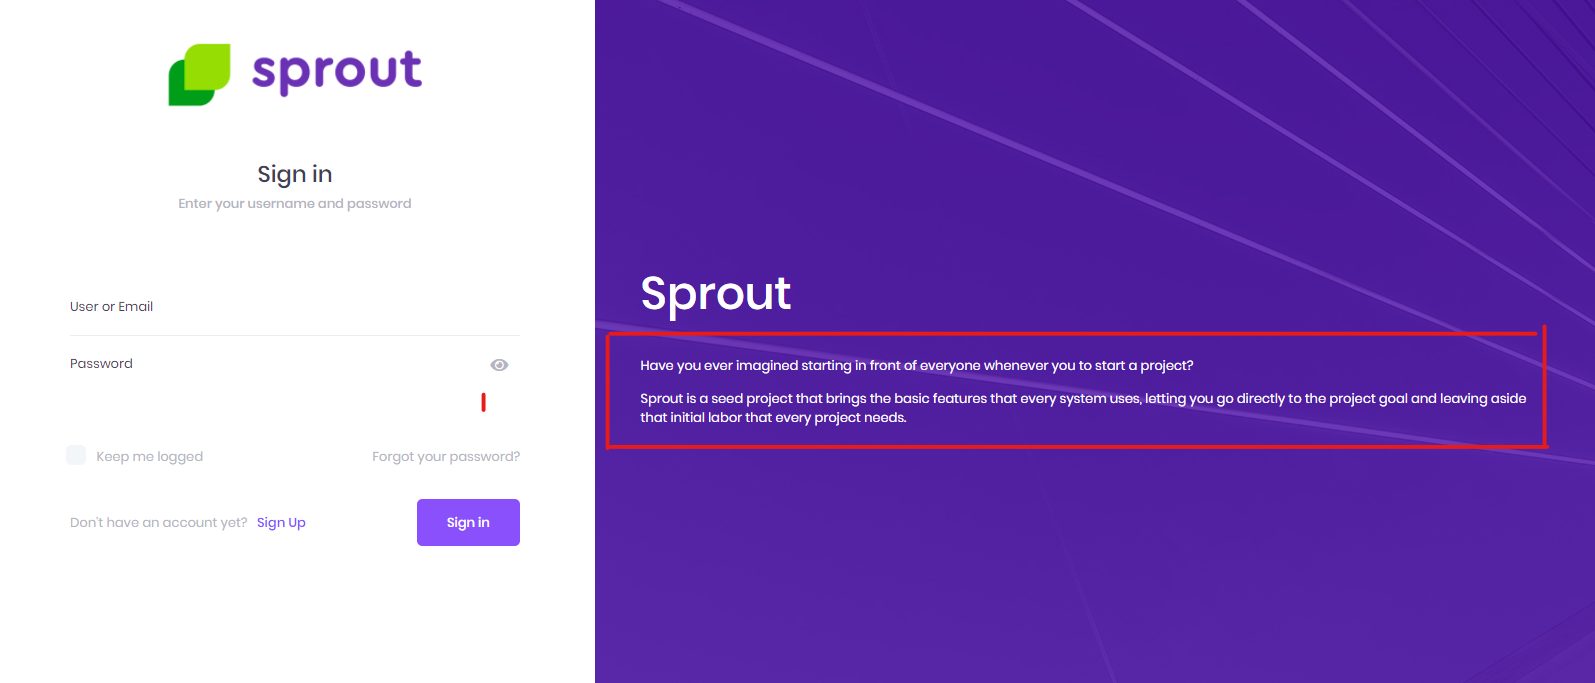
Note:
Only some login templates display information on the screen. See example below:
# Interface
In this tab it is possible to define most of the resources associated with the system interface.
- Customer Type
- Types of Addresses
- Administrator Notification
- Show Home in Menu
- Home Page
- Menu items without pages
- Language
- Page color
- Nightlight
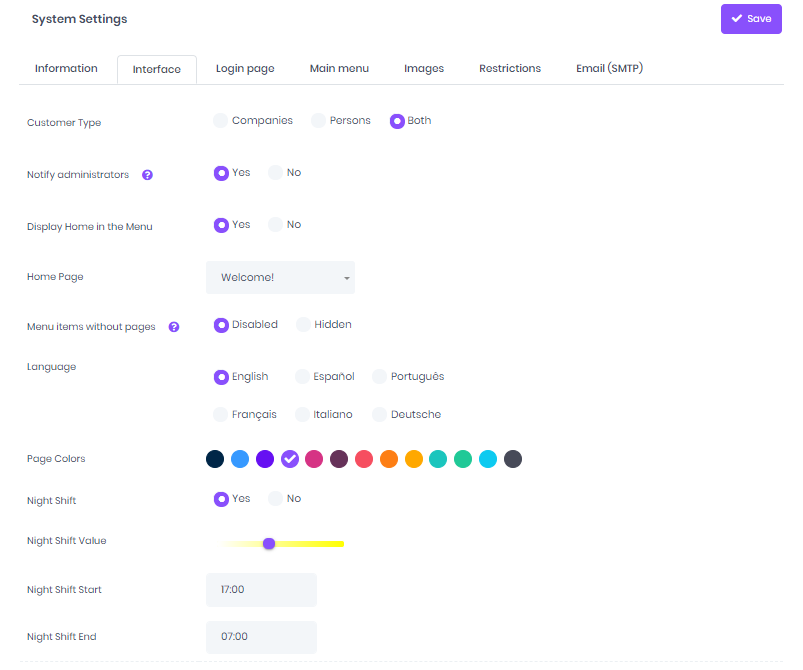
# Customer Type
Allows you to define how the customers model will work.
In Companies mode, the system will register and display only companies (legal entities). For People, the system will register and display only individuals.
And also, there is also the possibility to work with both options together, selecting the option Both.
This item is only displayed if all the applications of the customers model are part of an active menu.
# Types of Addresses
Allows you to manage the types of addresses available for registration. By default, we provide Bill, Commercial, Delivery and Residential.
Address Management is only available for Portuguese language.
# Notify Administrators
Notify administrators when there are changes to the system, such as new users, employees, departments and changes in system settings, for example.
# Show Home in Menu
Sets whether the Home item will be displayed in the menu.
# Home page
Set system home page after login. Also, it works for the Home item, when enabled.
# Menu items without pages
Defines whether menu items, which do not contain pages, will be disabled or hidden.
# Language
Allows you to change the system-wide language to the following languages: English, Spanish, Portuguese, French, Italian and German.
Address Management is only available for Portuguese language.
# Page Colors
Sets predefined colors for background changes and page items such as buttons and icons:
- ■■ Marine
- ■■ Blue
- ■■ Indigo
- ■■ Purple
- ■■ Pink
- ■■ Wine
- ■■ Red
- ■■ Orange
- ■■ Yellow
- ■■ Green
- ■■ Teal
- ■■ Cyan
- ■■ Gray
# Night light
The screens emit blue light, which can keep you awake at night. Nightlight displays warmer colors to help you sleep.
When enabled, allows the user to set the intensity and period of the night light.
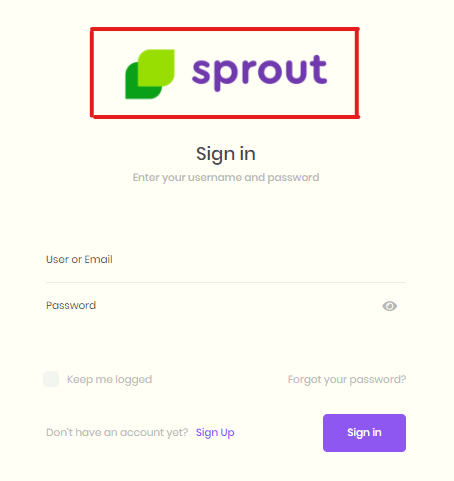
# Login Page
On this tab you can define the settings associated with the system login.
- Login Layout
- Background Mode
- Background Color
- Recover Password
- User Registration
- Standard Department
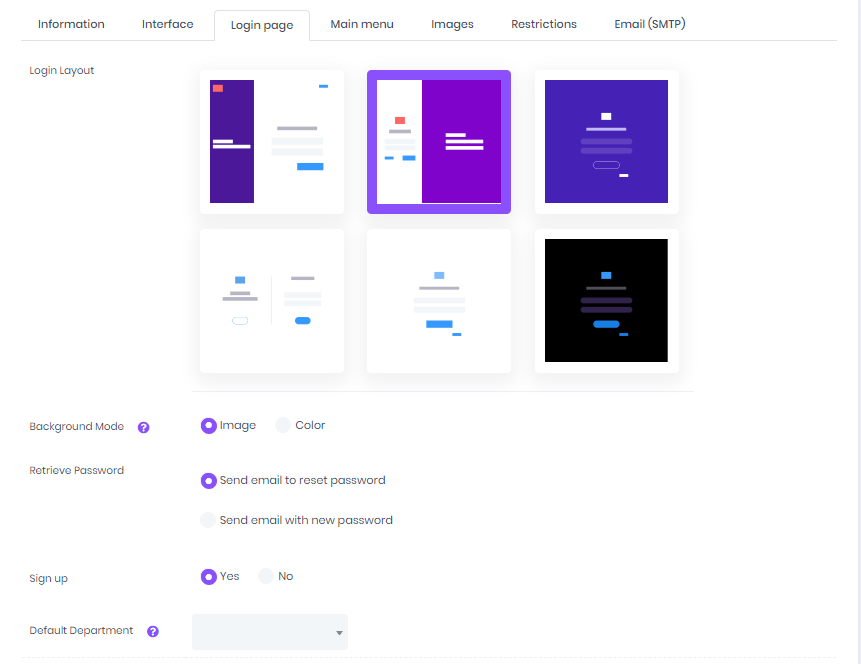
# Login Layout
It presents six layout options for the system login page, just choose the desired option and confirm the desired template by clicking on the Save option.
# Background Mode
Defines whether the login background will display a color or image.
Color option is only available for 1, 2 and 3 login templates. For other models, the option is automatically set to image.
All login templates have default image for background. It can be replaced by a color or [image](#background image).
# Background color
Set predefined colors for the login page background color:
- ■ Dark
- ■ Marine
- ■ Blue
- ■ Indigo
- ■ Purple
- ■ Pink
- ■ Wine
- ■ Red
- ■ Orange
- ■ Yellow
- ■ Green
- ■ Teal
- ■ Cyan
- ■ Gray
The color option is only available for 1, 2 and 3 login templates. For other models, the option is automatically set to image.
# Recover Password
Enables changing the type of password recovery.
Send email to reset password: The user will receive an email with instructions and a link to change the new password in the system itself.
Send email with new password: The user will receive the new password directly in their email.
# User registration
Determines if the system will allow new users to be registered from the login page.
# Standard Department
Default department that will be automatically applied to the registration of new users through the login page.
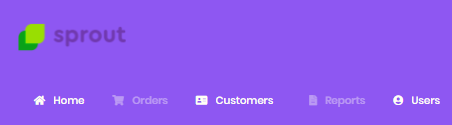
# Main menu
In this tab it is possible to define most of the resources associated with the system menu.
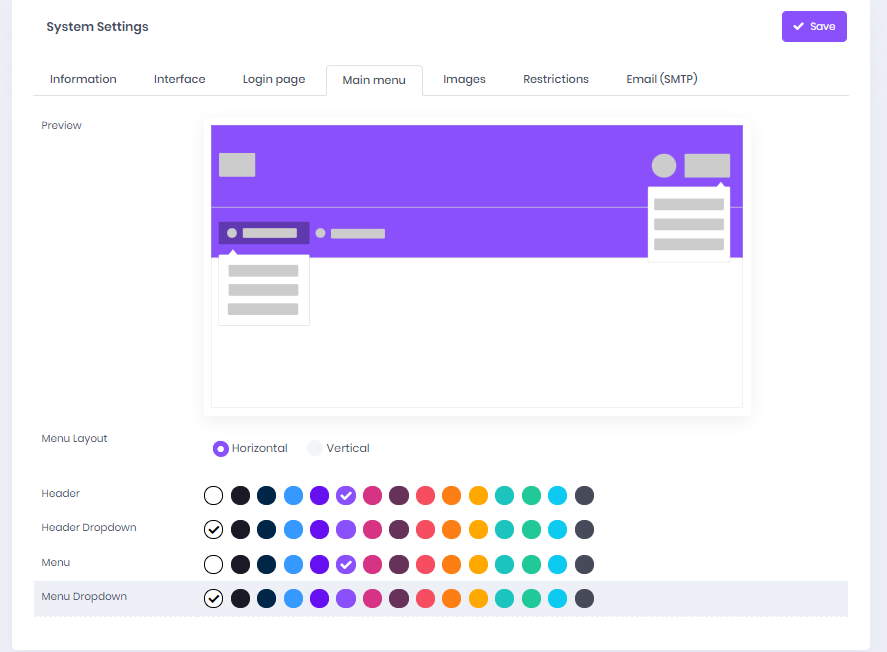
For all options, Sprout provides predefined colors so that the user can make combinations:
- ■ Light
- ■ Dark
- ■ Marine
- ■ Blue
- ■ Indigo
- ■ Purple
- ■ Pink
- ■ Wine
- ■ Red
- ■ Orange
- ■ Yellow
- ■ Green
- ■ Teal
- ■ Cyan
- ■ Gray
# Menu layout
Defines whether the menu layout will be Horizontal or Vertical.
The Logo and Menu Dropdown settings vary according to the chosen type, in the Menu Layout option: Horizontal or Vertical.
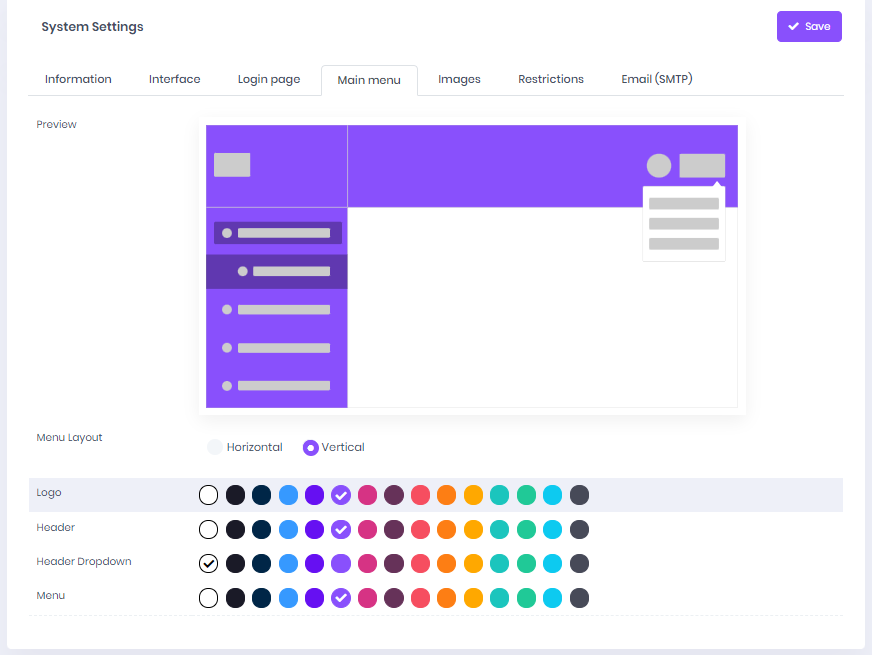
# Logo*
Changes the background color of the area destined for the menu logo.
*This option is only available for the Vertical menu
# Menu Dropdown*
Changes the dropdown color with the horizontal menu sub-items.
*This option is only available for the Horizontal menu
# Menu
Changes the color of the main system menu.
# Header
Allows you to change the color of the system header.
# Header dropdown
Changes the color of the user menu dropdown located in the header.
# Images
Tab where the user can define the images that will be displayed on the login page and main menu.
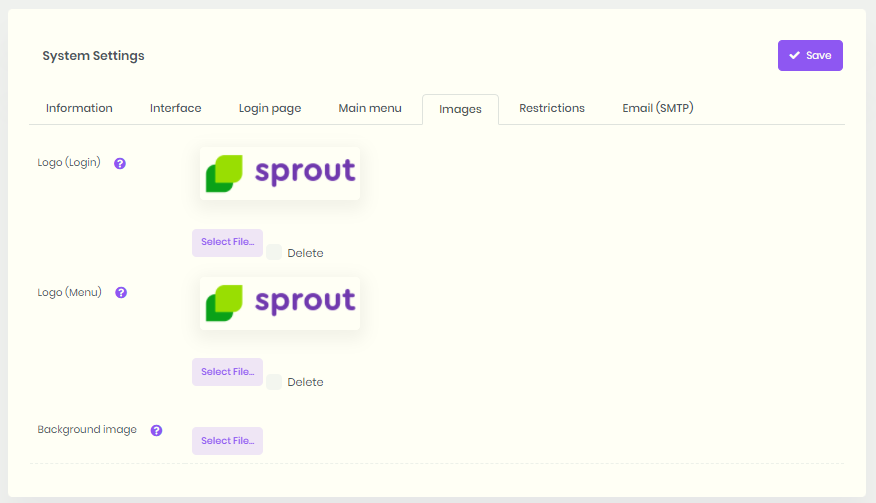
# Logo (Login)
Changes the image displayed as logo on system login.
# Logo (Menu)
Changes the image displayed as logo in the system menu.
# Background image
Defines, in case the user does not want to use any of the standard templates, the background image of the login page.
# Restrictions
Tab where you can define all restrictions and blocks applied during system access.
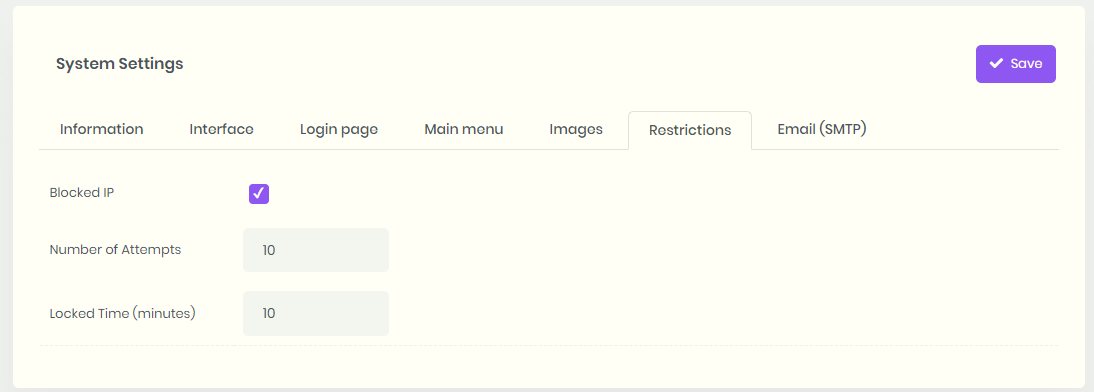
# IP blocking
Allows user to choose whether an IP will be blocked after specified number of access attempts.
# Number of Attempts
Defines the number of IP access attempts allowed.
# Block Time (minutes)
Defines the amount of time the IP will remain blocked.
# E-mail (SMTP)
Allows you to define the e-mail settings for using the registration of new users, password recovery and warnings to the system administrator.
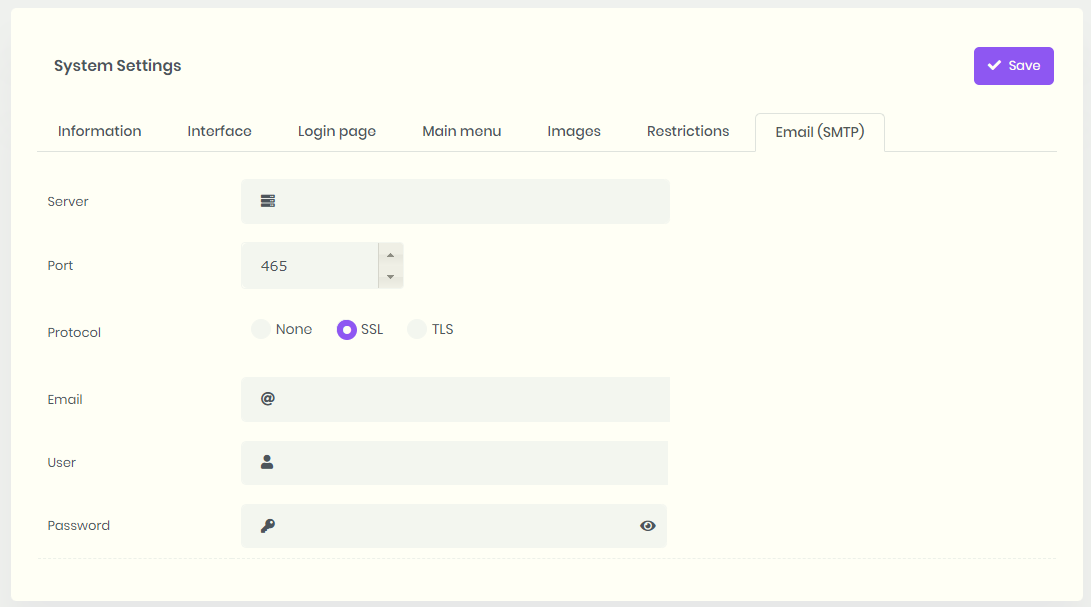
Observation:
All information to be entered above, except username and password, must be provided by the email server used.
# Menu Management
Application that allows the inclusion, alteration or exclusion of items and sub-items displayed in menu.
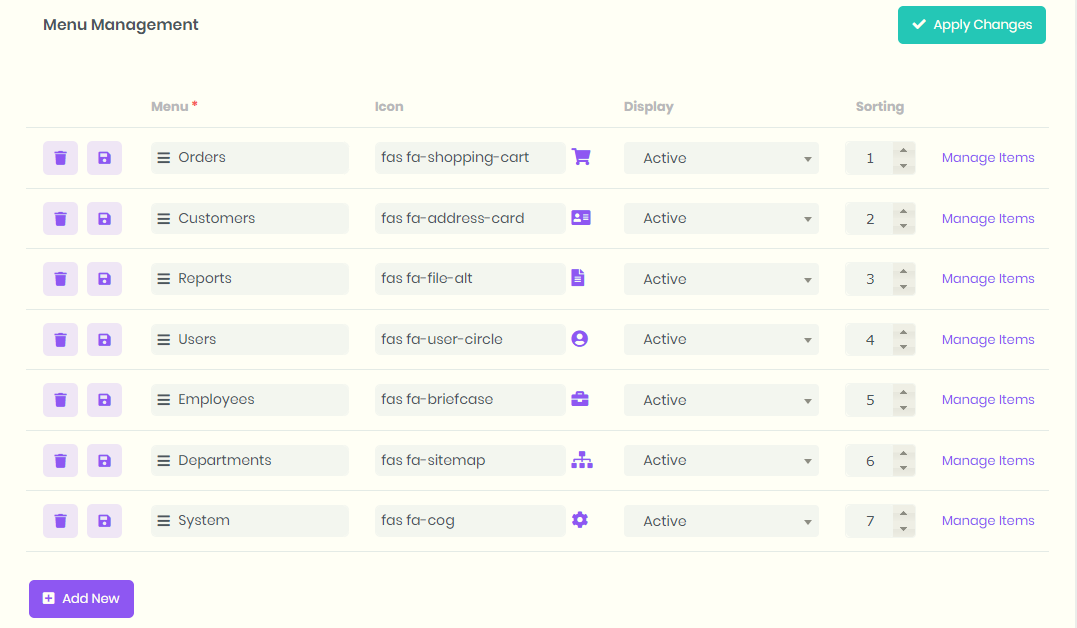
# Menu
Field for creation of menu item.
# Icon
Defines the desired Font Awesome icon.
# Exhibition
Allows you to define if the item will appear active or inactive in the menu, that is, if it will be displayed in the system.
The Customer Type is only displayed if all the applications of the customer model are part of an active menu.
TIP
Unlike menus without pages, the menu set to inactive will be unavailable in the system.
The menus, which does not contain pages, will be shown disabled in the main menu.
This behavior can be changed in the system-settings option Menu items without pages.
This setting allows the administrator to combine different menu views for different departments.
# Ordering
Defines the numeric order in which items will be displayed.
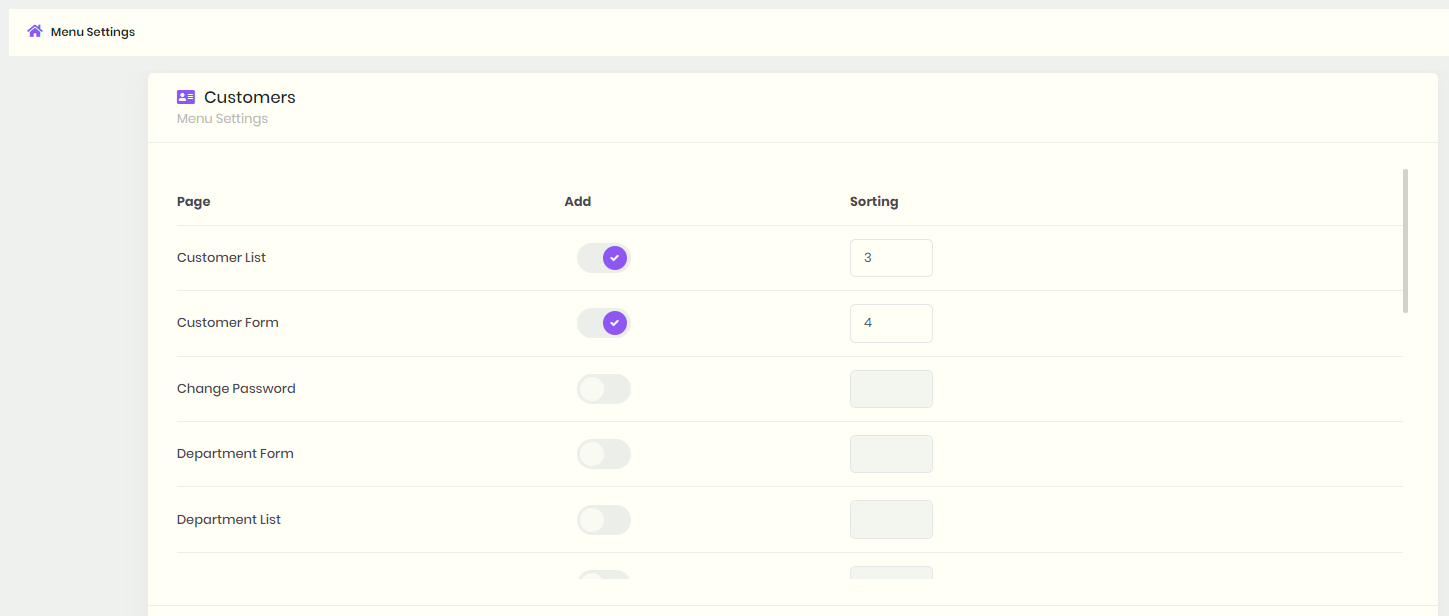
# Manage Items
It opens a new application, with the page list available to be inserted as a sub-item of the menu, just check Add and define the order.
# Page List
Application that lists all system pages.
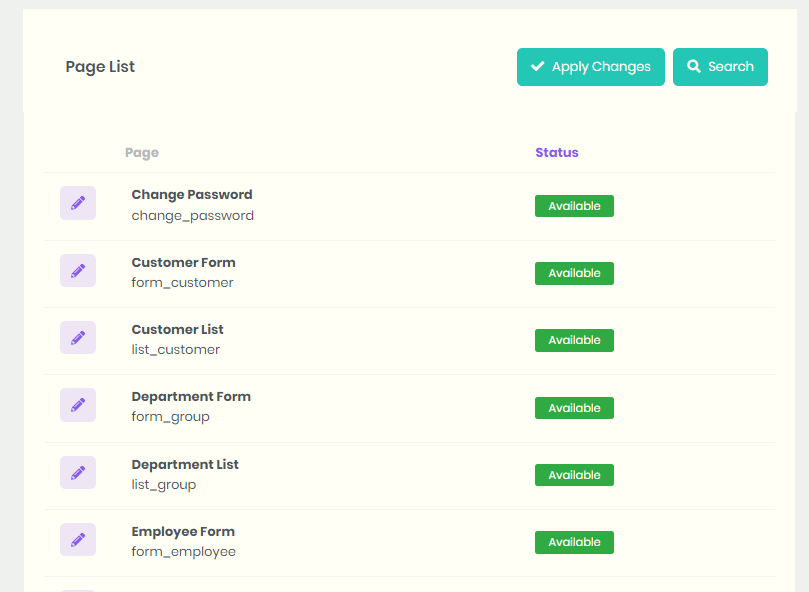
It is possible to configure the page description, situation and define a Font-Awesome icon.
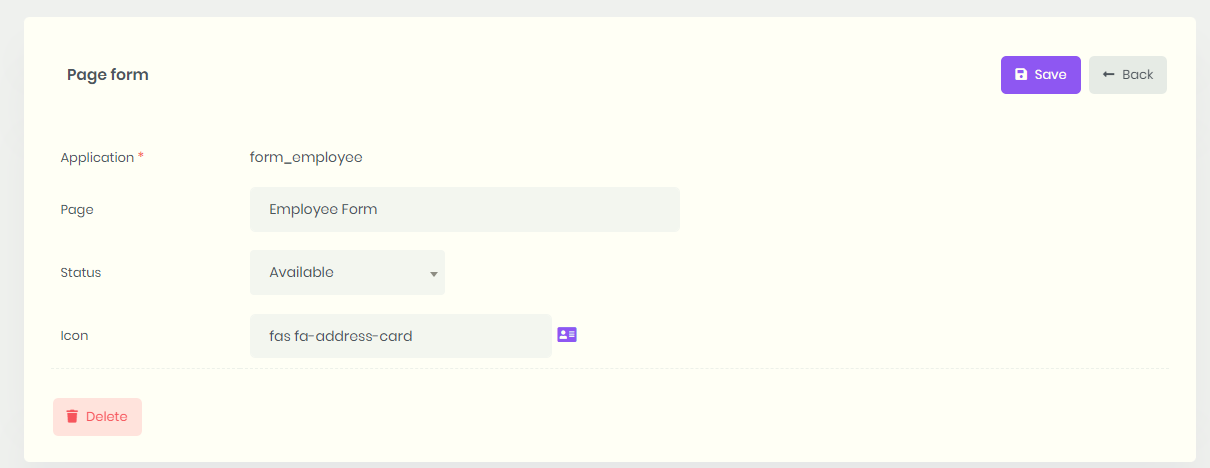
# Page
This is where we can change the application description when displaying the menu items.
# Situation
When Available defines that the page will be displayed in the menu, while when Hidden, it is hidden from users.
# Icon
Defines a Font-Awesome icon to be displayed with the application description.
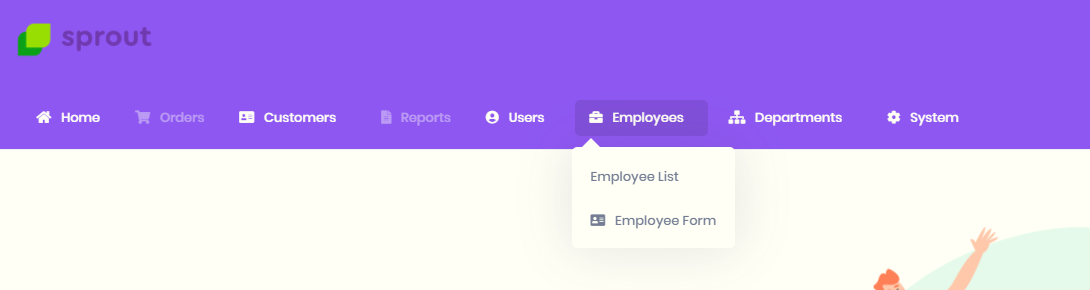
Example of how the page description is displayed in menu.
# Online User List
Page with the list of users accessing the system.
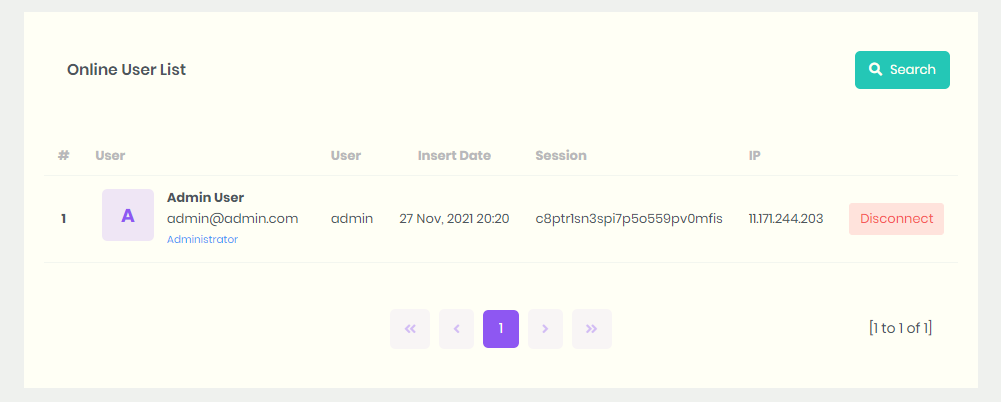
On this page, it is possible for administrators to disconnect other users from the systema.
# Send Notifications
Sprout has its own system for sending and receiving events and alerts.
Any user, according to the desired configuration, can receive a notification showing the message type, title and content.

# Send to
It defines to whom the notification will be delivered, the user being able to choose the Department, User or All options.
Note:
When choosing one of the first two options, a field is displayed listing the departments and users available for submission.
# Message
Field to enter the message to be sent.
# Pages
List of all pages available to be attached as a link to the message to be sent.