# Installation
# Prerequisites
Sprout has only two prerequisites that you should be aware of before installing:
- Compatibility only with MySQL, MariaDB, PostgreSQL, SQL Server or Firebird database;
- Version of Scriptcase (opens new window) 9.0 or superior.
# New project
Start using Sprout as the flagship of your systems right now. For this, learn the step-by-step necessary to download, import and pre-configure the project in your environment.
# Download
After downloading, unzip the file.
The package has scripts for MySQL, MariaDB, PostgreSQL, SQL Server ou Firebird, project for Scriptcase and a folder for project images:

The file ms_sprout.zip is the project to be imported into Scriptcase, there is no need to unzip it.
The .sql files are the scripts for creating tables in MySQL, MariaDB, PostgreSQL, SQL Server or Firebird.
Check the list of supported databases and their respective drivers below:
| Database | Driver |
|---|---|
| MySQL | PDO e MySQLi |
| MariaDB | PDO e MySQLi |
| PostgreSQL | PostgreSQL PDO |
| SQL Server | MSSQL Server Native SRV |
| Firebird | Firebird PDO |
Note:
To learn more about the assets folder, see here.
# Data base
We will show you how to configure for a MySQL database.
Choose your preferred bank manager (our example will use Navicat) and then follow the steps below:
- Connect to a previously configured database.

- Create a database with the name sprout or whatever you like.

Prefer to use the UTF-8 charset and the utf8_general_ci collation.
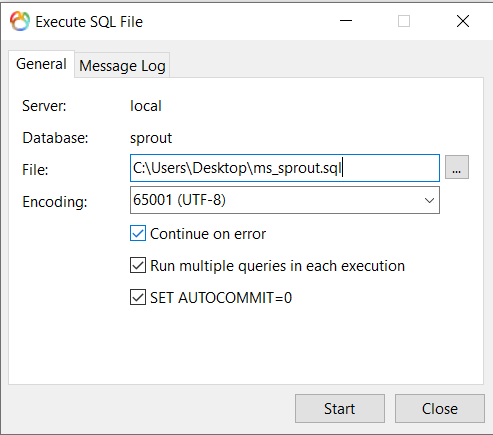
Open the newly created database and, with the right mouse button, choose the option Execute SQL File.
Choose the ms_sprout_mysql_en_us.sql file you downloaded earlier and click OK.
Note:
Sprout provides scripts in Portuguese, English and Spanish.
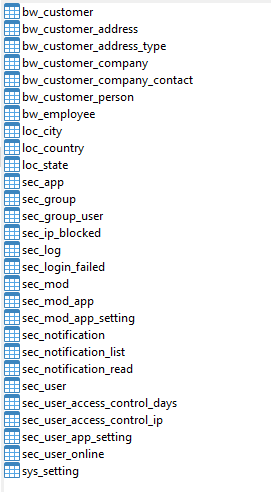
- The process should finish without errors. With that, all Sprout tables will be imported to your MySQL database.
# Import
Now that you have completed the database, let's import the project into your Scriptcase.
Access Scriptcase and follow the steps below:
- Go to Project → Import Project.
- Select the ms_sprout.zip file.
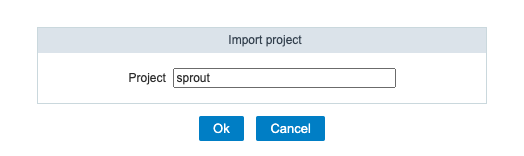
- Click to import. In this step, you will be shown a confirmation screen for importing Sprout.
In this step you can also rename the project name as you wish.
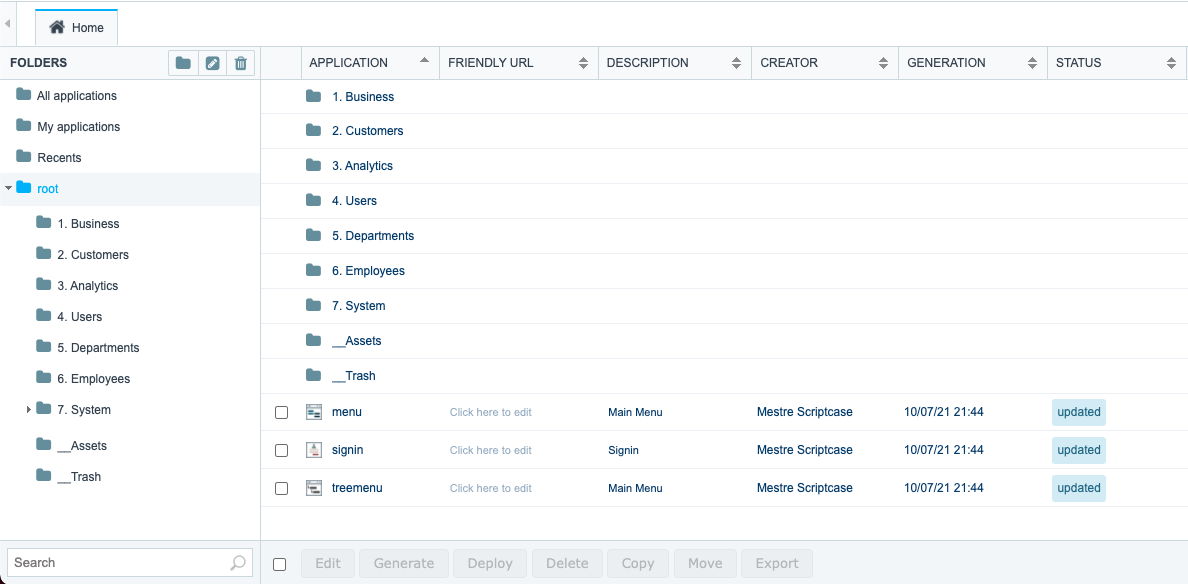
- Then, all applications will be loaded and, at the end of the process, you should see the following screen:
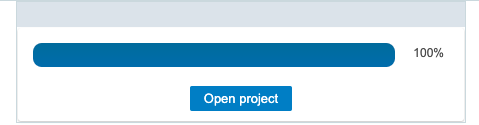
- Now it only remains to confirm the import and then you will have access to Sprout applications.
Observation:
Remember to access the project properties to change the initial values of Sprout and inform the data that suits your purpose.
# Connection
In this step we will configure the connection according to your database.
- Accessing the project in Scriptcase, click on Edit connection and select the connection conn_sprout.
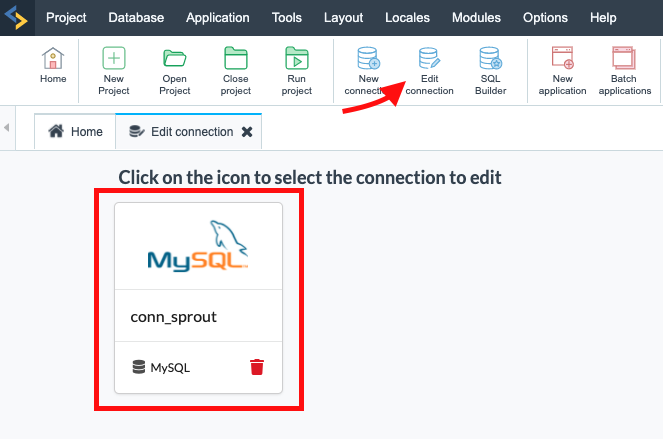
WARNING
For databases other than MySQL, it is necessary to delete the connection and create it again, selecting the desired database and naming it conn_sprout.
- Connect to the database created in previous step.
Observation:
Remember to select our database.
# Project
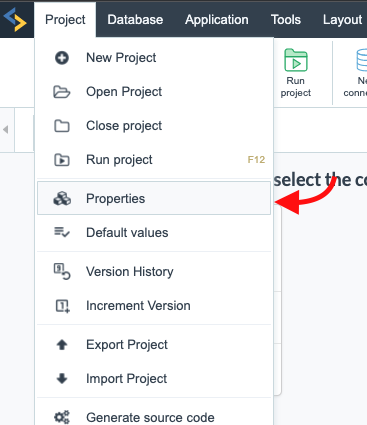
After all these steps, we recommend that you change the initial information, loaded with Sprout, to the data related to your project.
To do this, go to the Project menu and click on Properties.
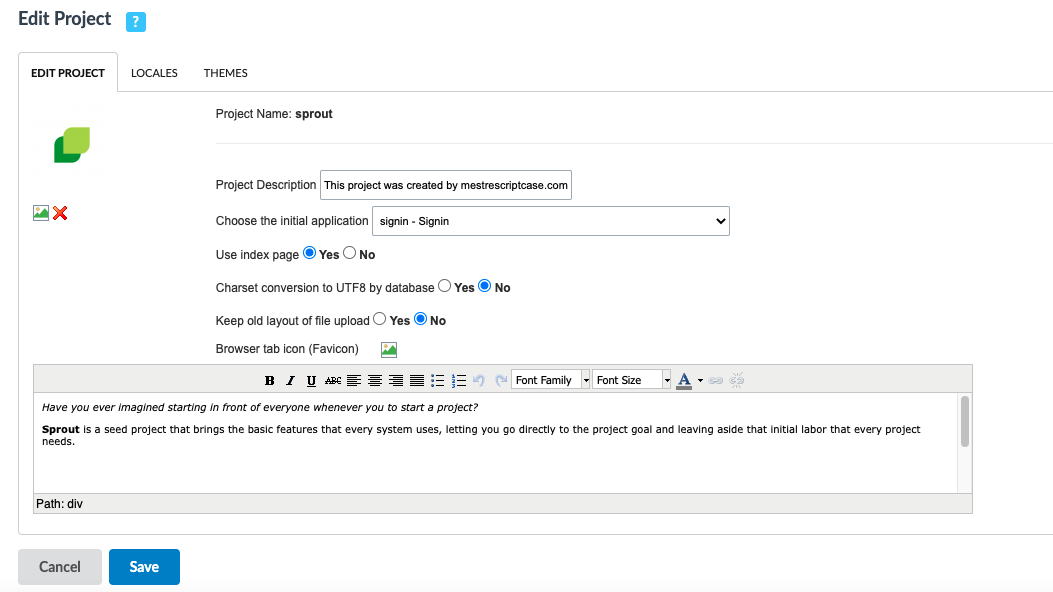
On the next screen you have the option to customize information such as project description, browser tab icon (Favicon) and image, for example. Know more (opens new window)
# Assets
Sprout Default Directory
By default, Sprout applications expect that there is an assets folder created in the same directory as your scriptcase folder.
Therefore, after importing the project, it is recommended that you:
- Copy the assets folder, which can be found in the package;
- Add the assets folder, in the same directory as the scriptcase folder;
This is a practice made by us to store all image and document files in a single directory. Thus, we have the facility to share the same directory in development and production.
TIP
To explain a little more, this is the structure:
assets/files/img/system - Stores all images applied in system configuration.
assets/files/img/user - Stores all user images.
assets/files/img/employee - Stores all employee images.
assets/files/img/customer/person - Stores all images of individual customers.
assets/files/img/customer/company/contact - Stores all images of corporate customer contacts.
Scriptcase default directory
However, if you do not want to use it this way, you can apply another directory through Application → Express Edition, following the step below:
After importing the project, it is recommended that you:
- Access the Scriptcase main menu in Settings → Administration → System Directories;
- Copy the values of Directory for Documents and Directory for Images;
- Access the main menu of Scriptcase in Application → Express Edition;
- Update Directory for Documents and Directory for Images of all applications in the Sprout project;
- Add the system folder, which can be found in the assets folder, in your Images Directory;
Default Scriptcase directory: /scriptcase/file/img
For publication, if you want to keep the development images, it is necessary to copy all the images from the assets/img directory and add them to the same publication images directory.
Remembering that, for typical publication, the image directory will always be in _lib/file/img.
As for the advanced publication, it is possible to define the path that the images will be stored.
Note:
Not to be confused with the __Assets folder in the project structure. This is for resources used by Sprout such as scripts, APIs, external libraries and others.
# Activation
Now that you have done all the necessary settings, you need to perform the last step to access the interface and resources that Sprout offers.
Our seed project is natively blocked for the first access, requiring activation via code.
This is the code you received by email at the time of purchase.
Follow the step-by-step steps below to activate.
# Copy the code received by email.
After confirming your purchase, you should receive an email containing the code for activation.
Copy the code received.
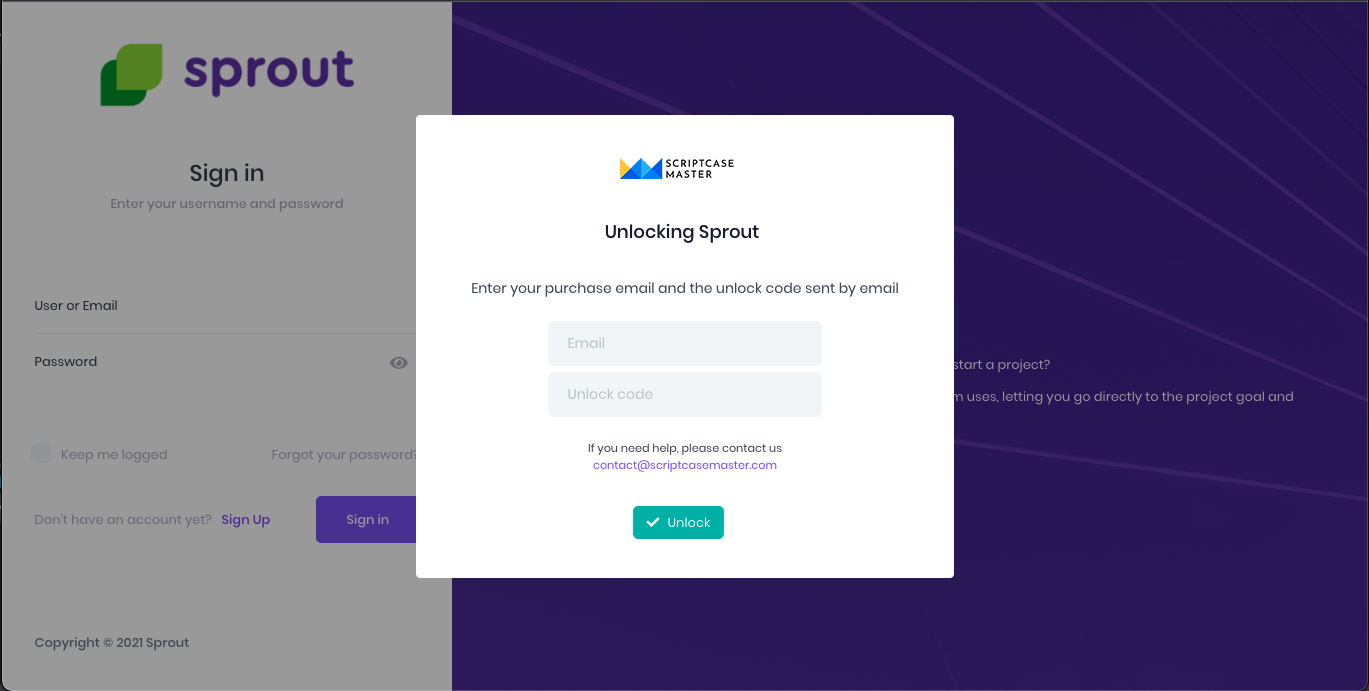
# Activate Sprout
Run the initial signin project or application.
You will immediately see an unlock request.
Enter the e-mail address used in the purchase, the same as registered on Hotmart, and paste the activation code.
Ready!
Your Sprout is activated and ready to use.
# Existent Project
To migrate an existing project that is not yet Sprout, it is necessary to migrate the tables from your old security module to the model we use.
To do this, you must follow the instructions available below.
However, remember to carry out all the step-by-step steps of the New Project step.
# Table Migration
We provide an application to facilitate the conversion of a database from an existing project to the structure used in Sprout.
# Adding Sprout to my project
WARNING
Keep in mind that the migration is your sole responsibility and therefore we advise you to perform a backup of your database before starting the process below.
- Copy the extra applications from the old project to Sprout;
Extra applications are applications that are not part of the security module.

Pay attention to themes, HTML templates, libraries and any other components that may be being used. We recommend reading the article about folder structure (opens new window).
- Export all tables from the old project database;
WARNING
The migration application just migrates data from one table to another table in the same database.
For different databases such as MySQL and PostgreSQL, for example, it is necessary to convert the entire structure and data to the same database.
- Import into Sprout database;
Recommended to apply a prefix like ms_ to avoid table conflicts.
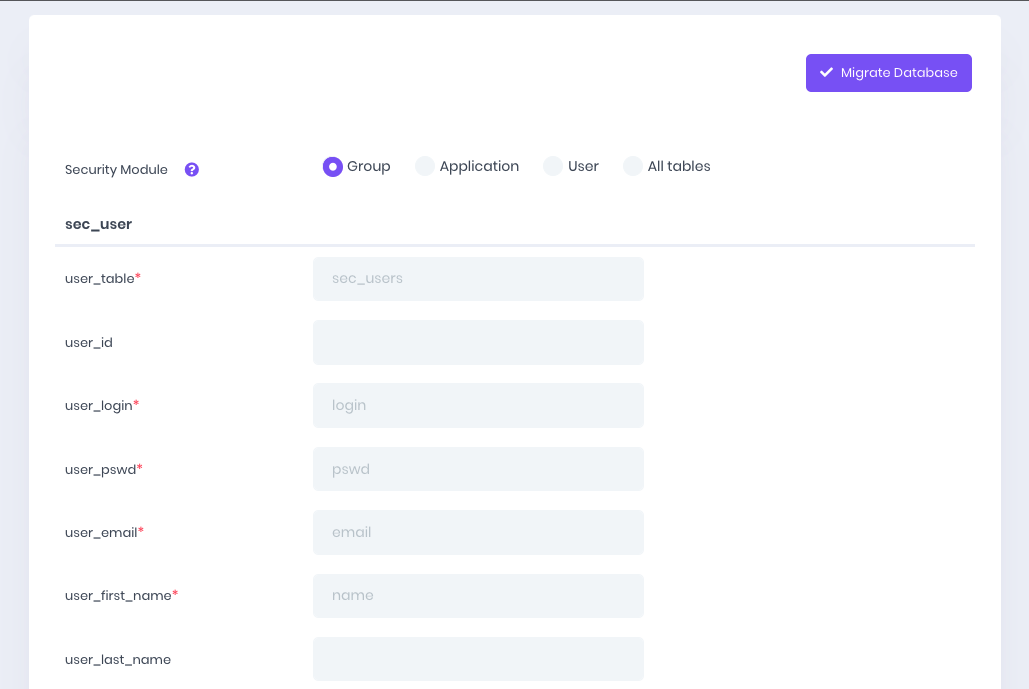
- Run the migration application located in the folder __Assets;
- Fill in all information related to tables and columns, using the security module used in the old project;
- Perform database migration;
Ready!
Your Sprout is now ready to use.
Now manage the menus in System → Menu Management and also the groups by associating them with the menus in Department → Department List.
# Sprout Update
If you already use Sprout in a project and want to update to the latest version available, simply import the ZIP file of the new version into your environment and then just follow the first step described in the topic "Existing project".
To illustrate, let's say you have a project called "Sprout".
When importing the new copy of Sprout, that is, the file with the most updated version, you must give this project a different name.
In this example: "Sprout_2".
Now that you have "Sprout" and "Sprout_2" in your environment, you should copy the extra applications from the older project to the newer one.
With the term extra applications, we are referring to applications that are not native to Sprout.
After completing this process, go to the "Sprout_2" project connection and edit it with the correct data.
At the end of the process, you will have two projects, "Sprout" unchanged and "Sprout_2" with the applications and data from the old project, but updated to the new version and, therefore, with all the new features and approvals available.
If you wish to keep the old name in the new version of the project, you must follow the steps below (in addition to those already mentioned), since Scriptcase does not allow project renaming:
Backup and export both projects;
After exporting, delete the projects from your environment and re-import only the backup file of "Sprout_2", renaming it to "Sprout".
Note: If you have made changes to Sprout's native applications and want to keep them, we recommend that you copy the changed content and take it to the new project manually, in order to prevent the content of the most up-to-date version applications from being compromised.
# New Applications
For new applications or even applications migrated from another project, it is necessary to follow some standards for the applications to work correctly.
# Page Titles
To apply the title of the pages it is necessary to use the appSetting() function in the onScriptInit event of the applications. The appSetting() function applies the application name to the page's toolbar.
To avoid conflicts, do not use buttons on the left side of the upper toolbar.
For applications copied from other projects, make sure the internal library appSetting is enabled in the application settings.
WARNING
Disable the option Display Ajax output in the application settings.
Applying the title of the pages in the onScriptInit of the applications
appSetting();
# Navigation path
By default, we also create a lang, to apply to the application header. Because the navigation path of the menu uses the header content to create the link.
Go to Translate Applications in the folder Project Messages → apps
Create lang as lang_< application name >_name
Use that same lang in the application header.